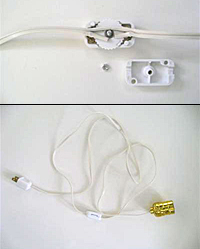
To attach the switch, start by using the X-acto knife to make a 7/8 inch slit down the middle of the cord about 18 inches from the socket end, separating the two insulated wires. Snip a section out of the wire of the cord's unmarked side. Undo the small screw that holds the switch together (be careful not to lose it or the tiny nut on the other side).
Lay the cord flat inside the switch with the cut-wire side over the metal prongs (there's one at each end). They should pierce the cord. Reassemble the switch around the cord and screw it back together.
It's a good idea to test your cord set with a lightbulb to make sure it works before you install it in the blender. (If it doesn't, check that the metal bits in each component have proper contact with the copper wire inside the cord.)